If you are a busy public servant or the big boss, then every day you have to sign the various documents with your personal signature. There is a hidden tricks in OS X that you may never know before, it allows you to import your personal signature to Mac and insert it into a PDF without a scanner. This fantastic features hidden in the stock Preview app in OS X, the only thing you need to prepare an ordinary paper and a pen.
How to scan your signature Without scanner on Mac
Step#1 First of all take the white piece of paper and sign on it.
Step#2 Now launch the Preview app and from the menu bar click on Tools > Annotate > Signature > Manage Signatures.
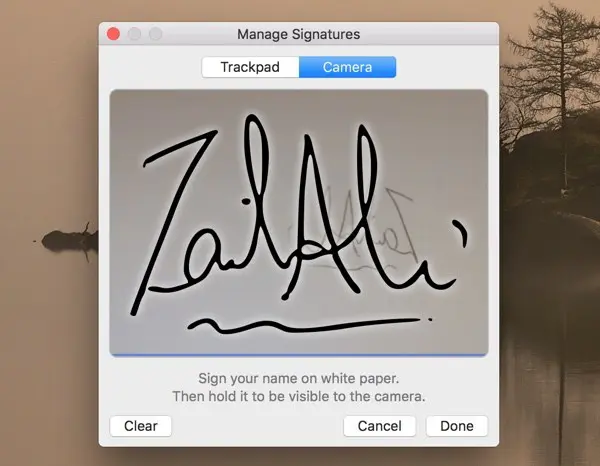
Step#3 On the Manage Signatures window you will find two options, ‘Trackpad’ and ‘Camera’. While you can use trackpad to enter your signature, we recommend using the camera for better results. Hit the ‘Camera’ tab and then place the signature you just made on the white piece of paper in-front of the iSight camera. Make sure the room has enough light for the camera to read the signature properly. If light is not available, try increasing the screen brightness as that would help a lot.
Step#4 Once the signature has been scanned properly it will appear on the screen, hit ‘Done’ if you are satisfied with result or scan again if you are not by hitting the ‘Clear’ button.
Well, you already imported the electronic signature on Mac, now you can insert it into any document you want.
How to Insert digital signature into PDFs
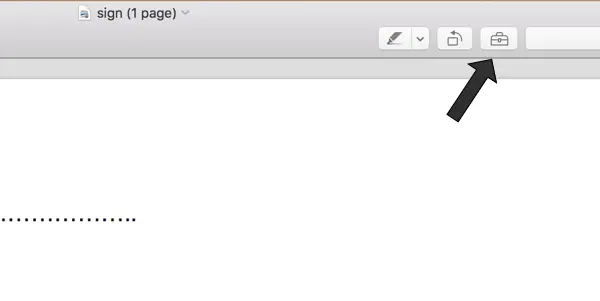
To insert your signature in a PDF that is opened in Preview app, click on the ‘Toolbox’ button as shown in the screenshot above.
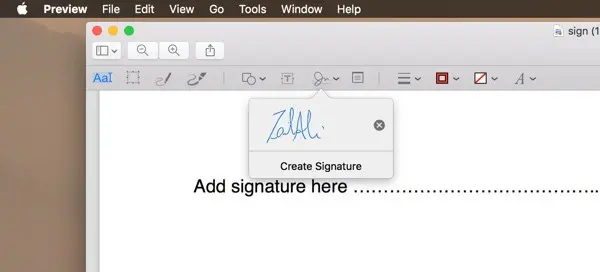
Now click on the ‘Signature’ button from the menu bar that has appeared. You will get a list of all the signatures that are added in your computer, click on the one you want to insert, resize it and adjust its position.
That’s it! You imported and inserted signature to PDFs on your Mac. If you have any questions, then let us know in the comments section below.


